The power line fellas came around and dropped a tree in the front section a few months ago. I went down there and put my tarp over it all as a kind of claim to ownership, because the front section doesn't appear to be ours. People might get to thinking the wood was up for grabs.
I eventually found a chainsaw to loan and cut it all up. We probably got about 2 months worth of wood out of it. The next few days I cut up the vine covered trees out the back. At least another month of wood in that pile too. I quite enjoyed using the saw :)
Well, the wind, rain, snow and cold is driving in on Dunedin today, and we're all thinking about heating. Here's my story so far...
Last week I ordered $100 of "dry, eucalyptus firewood". The fella came and tipped it on the lane in front of my house and served me the bill plus delivery fee. (I'm still getting used to the quality of service in these parts). As I was shifting the pile to a better place I couldn't help wondering how heavy and wet it felt. The delivery fella was long gone and anyway, I'm sure he would've palmed me off with some remark like "sweet as mate" or "nah, its as good as gold". On the first day we tried to use it we were bitterly disappointed. Hard to start, a log actually kills the fire if its not hot enough! This stuff is still wet and green!
So we went and picked up a few old packing pallets from the hardware stores that give them away. Pallets come in pine, oregon, and even eucalypt! After breaking them up we have good heat. I'm very reluctant to waste the expensive load of firewood on the flame if it is not properly seasoned, and there's no way in hell I'm going to drive our power bill up from a nice $40 per month to well over $250 per month just through electric heating! (our neighbours hit $420 last month!!!)
Enter the firelogs we found down at the warehouse. We discovered these things for the first time this week and we're liking them! Made from compressed sawdust and although the box says nothing added, I suspect they have paraffin wax in them. These things burn hot and long! I estimate that one firelog burns for about 1 hour. A box of 8 costs $6, and you could make a box go one night in a good firebox. So by my estimates it would cost $180 a month to burn firelogs. It costs about $120 a month on delivered firewood.
For $60 extra what do we get?
Ready to burn, cleaner to burn, better heat, excellent cooking coals, very tidy, no chop chop, easy storage, easy portability, feel good for using a waste product...
If we could find dry seasoned wood, we'd probably go for the cost savings over the firelog - unless we find a cheaper supplier. We really like having a fire, it is miles better heat and more reliable than our neighbour's air conditioner. And our firebox seems to cost about the same to run as an airconditioner. I think we'll be planting a few eucs down the front section this winter - they might come in handy a few years from now...
 I put Broad Beans (seed), silver beet and celery (seedlings), in my zone 2 yesterday. I should perhaps put more BB in as I only planted about 20 along a trellis.
I planted seeds for baby carrots and onions in tires up in my zone 3. The potato tires worked well through summer. I got a pretty good yield considering the condition of the soil and my lateness (again) but must of all I have noticeably better soil after the potatoes. I'm hoping for great carrots and onions now, and have a theory that the tires will help keep the soil a little warmer (if that a good thing for carrots and onions?)
I put seeds for spring onions and chinese broccoli in my zone 1. I'm still looking for miners lettuce and sorrel. I also put in a range of herb seedlings (Thyme, rosemary, lemon balm, oregano, russian (tarramond?).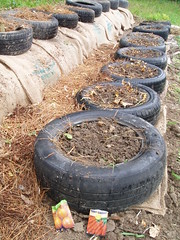
After all this, I'd really like for people to come around and check it out! I am totally in love with this whole process, and the fact that at the age of 32 I am finally getting to know where food comes from. As well as feeding my wife and I (hopefully) the whole process has been very therapeutic.
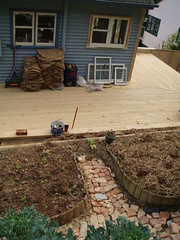
It took a while, but we finally have the deck and doors in and boy has it made a difference! We can now hang outside in comfort with plenty of space to spread out, and plenty of sun to soak up.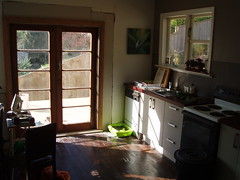 We have planter boxes all the way around for our herbs and perennial salads and the like, and over them we will plant fruit. The sun is now bouncing in off the North deck and straight in through the glass doors which has noticeably improved the passive heating inside. We've had 1 week of wintery weather already with outside temps down to 6, but inside was comfortable and warm without heaters. Of course when the sun goes down we need to start the fire, but the warmth inside lasts through the twilight well into dark. We are both very pleased with it.
Structurally it is solid as! We have 2 x 300mm round 3.6m posts that are sunk into very clay ground around 800mm (basically on bed rock each). They are held there by 8 bags of 30kPa concrete (4 in each).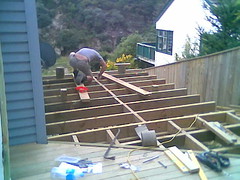

The 2 150x50 beams attached to their tops span 1500mm to the next 2 posts which are 100x100's sunk in over 600mm and held again by 30Kpa. The beams span another 1500 to 3 anchor posts that hold a beam coming off from the house.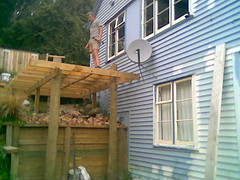
The joists cross the beams at 400mm intervals, and also span 1500mm with 400mm over hang. I put noggins through the centres of the joists for a bit of bracing. The 40x100 decking is finished with decking nails, with facing around the joists.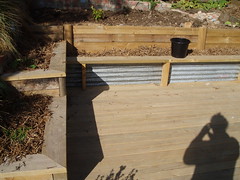
Around the back there are 150x50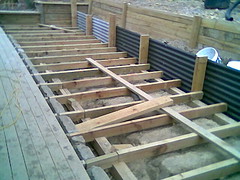 and 100x100 bearers on posts and an old concrete retaining wall. The 150x50 joists are spaced 400 and span the 1200 space between the bearers. Then the ground steps up under the deck, requiring posts, 100x100 beams, and 50x100 joists. The posts span 1500 in both directions so that the bearers span 1500, and the joists do as well. These joists are also spaced at 400.
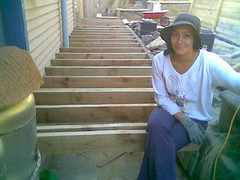
 The doors are second hand Rimu timbers from Shaw's Yard and were framed by Shaw with treated pine. They sit in what was a window space.
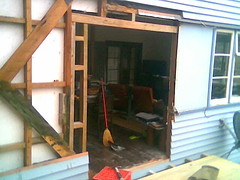
The windows needed replacing, as did a number of weather boards due to significant rot.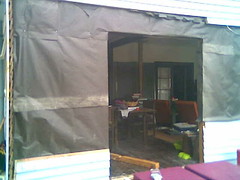
I have used Aluband sealing tape to seal up all around the door frame, under the foot, and across the top flashing. There is now pink batts in the walls all around the door. The doors themselves swing clean and easy.
Now I need to plaster and paint the new gib inside, and build a railing around the high points of the deck. We plan for 150x50 posts standing 1500 high with a dressed cap for a railing across the top. We'll use Suntough panels on the outside of these posts with at least 1 shelf running low so we can use the cavity in the railing for plants. The 1500 should retain some of the privacy for next door without us losing sun through the doors.
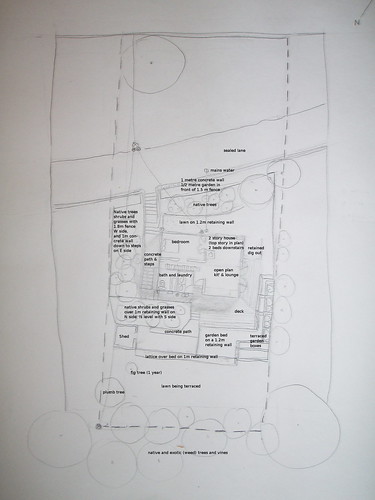
Our first assignment for the permaculture design course has been to draw a base map.
A base map is a drawing that captures everything that is in place already on a property or space. It includes buildings, fences, trees, hedges, pathways and driveways, power lines and pipes... things that are in place.
Here's my Base Map:
Google maps does a pretty good job at capturing it too...
View Larger Map
so, we're on a steep NNW facing block that is reasonably sheltered from all winds, although the cold Southerlies can touch our front pretty hard... but now I'm starting to get Sector Analysis about it, which is what I should be focusing on this week:
A sector analysis map is a drawing that depicts what is happening in that base. What is the sun's path, what are the wind and rain directions, where are the main areas of people activity, where are the shade areas.
So I've been going along to the Sunday sessions for the Permaculture Design course, where we have been focusing a lot of time on the principles and ethics of permaculture. I agree that these need a lot of time and they are quite inspiring ideas that could be applied to just about everything we do (even organisationally), but I get a sense that the face to face participants might be feeling that the course is moving too slowly and that they would like to start getting into more tangible activities.
I'm really glad though that the online group is there with us. Their emails and blogs have given me a lot of motivation to research and maintain the course wiki and related resources, which in turn has kept me feeling as though the course is very active. However, because the face to face participants seem to be not participating online, they may be feeling that the Sunday sessions aren't moving along quickly enough. Today Kim and I spent a few minutes showing the face to face groups around the online work being done, so I hope some of them will come on and start putting more into the course so that they may get more out of it, but I suspect that that is not what they expected when they enrolled in the course.
So far we have the course wiki that includes the course schedule and links to any media recordings we capture throughout the course, as well as a discussion page that captures the latest from the online participant blogs (we're still waiting on 3 more). We have also started a Permaculture Design textbook over at Wikibooks that would at first appear to be all by me, but I've simply been copy and pasting the handouts, and some of the notes from the participant blogs as a process of my own study in the course. The text will hopefully evolve into a self sustaining resource for many others to use once it reaches that critical wiki point. And there's an email forum running for people to keep in close contact if they struggle with anything other than email.
What has surprised me is the level of interest that was quickly expressed by people from Portugal to Vermont, and how web savvy they all are :) It turns out that international interest in permaculture is quite high, which is easily verified by the extensive network of websites and media over the Net for it. With the the online participants helping us to use this pilot course to develop online communication channels and information, we will hopefully have a certificate level course soon, with an online study option, that will help enhance and sustain the face to face course.
Just a quick note to say that I've enrolled in a Permaculture Design course. I intend to use it to design a plan for our house, as well as my place of work. The course is doable online too. I am helping with the development of that, drawing content from the face to face course as it goes along. We already have a great group of online participants from all around.. it has a good feeling about it :)
Here are some video's I captured from the Permaculture Design course field trip to Harmony Farm.
peta hudson - harmony farm and where to find information
Harmony Farm
Field trip to Harmony Farm - microclimates
Peta Hudson - Permaculture teacher
Participant intros - Permaculture Design Course
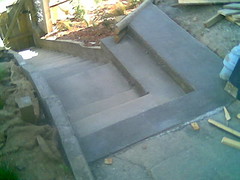 Our front steps have now been tidied up so that we have better access to the front yard. We still have to render the concrete now, but here's a little update and how we did it:
 We bought about 20 metres of 150x20 mil rough sawn pine for the step form. (150 is a perfect step height).
Because steps want to be at least 300 mil deep, and we needed a side wall, we also bought about 6metres of 250x20 board to make up the diagonal side walls.
If you look closely, you might be able to see that I notched out the diagonal to hold the step form. I prolly would do this again, as it made screeding difficult, and removing the form difficult. The little square boards you can see on the side wall and the batten brace were easily anough to hold the step form.
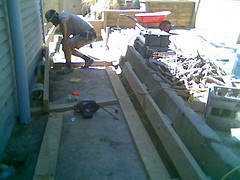
It was a last minute decision to pour yesterday. We hired a 6x4 trailer ($30), and lined it with plastic ($14) to pick up 0.6 cubic meters of ready mix ($130). It was a hot and windy day, so we have to be quick with it. Mike from next door brought over some buckets and we chain carried it into the form. We moved quickly with this, placing rocks to fill out some space and ensuring that the rocks were placed well away from the sides. We had the pour done in just over 30 minutes.
Estimating an hour for the mix to start hardedning in these conditions, we wasted no time leveling off the pour using straight timber to start and a trowl to smooth. About then Sarna and Chico arrived, surprised to see that we had already done the pour, but in time for the leveling.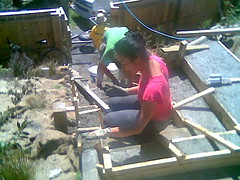 It was a little fiddley doing this actually, and it turned out that we didn't quite have enough (short by 1 bucket load). So we skimped on the side wall to make sure the steps were full.
About 30 minutes later we had the basic leveling done. Sunshine went and made sausages and drinks while everyone else finished the smoothing of. We didn't mess around with it too much towards to end, basically just getting it to the right level.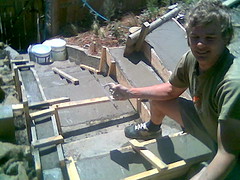 Then we let it go a bit hard (finger hard, another 1 hour) so I could use a scrubbing brush to take out any ridges and bumps. I finally finished the surface off with a paint brush, and rounded the edges a little with the trowel.
 Next morning I pulled off the form to reveal a mostly good result. The air pockets are not too serious and the rendering will finish it off nicely. The steps are all a good height and level and are strong. I need to research rendering a bit and will do that in the next week...
 Pretty happy with our first attempt at concreting, and feel confident about the rest of the job around the back. Well have to get around 4 cubic meters pumped around the back ($800 + $280 for the pump :( Its very expensive, almost as much to cover the area in timber. 2nd hand pavers would be cheaper and use less in terms of non renwable material, but a lot more work... still thinking about it.
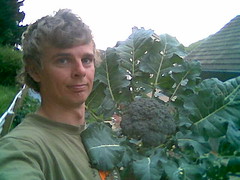 Took out the two broccoli today. They looked ready, but taste a little sour :( I wonder if their taste has anything to do with the soil they were in. They where in very clay soil, their leaves had been chopped by slugs, but a used no sprays... they certainly look healthy, but taste sour. Perhaps I picked them too soon or too late?
The cauliflower and brussel sprouts have a little bug all over them. The damage appears to be minimal, but I 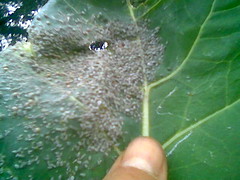 don't know what they are and so have no idea how to get rid of them.. I've done a brief search for cauli pests, but can't find anything that looks like what I have here... They could be mealybug but I'm not so sure. The mealybugs I know are more white than this grey colour, and are flatter and harder to see as bugs. These are easy to see as bugs.. note: the Internet needs a user generated image index where I can just scan images of pests categorized by their colour and size perhaps... or upload my own image for others to help identify...
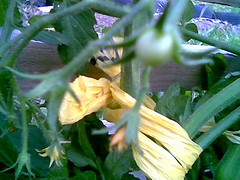
Finally, we have some fruit buds on the tomatoes, and new shoots on the potato tires :)